Nutrient-Rich Sourdough Tortillas: Elevate Your Meals with Sourdough Discard
If you're seeking to infuse your everyday meals with a distinctive flavor and a wholesome touch, look no further than homemade sourdough flour tortillas. These culinary marvels ingeniously marry the beloved tangy essence of sourdough with the wonderfully soft, pliable texture that makes traditional flour tortillas so irresistible. Whether you're wrapping up a hearty burrito, crafting perfect tacos, or simply savoring them with your favorite spread, these tortillas are set to become a staple in your kitchen.
For those already devoted to the art of sourdough baking, nurturing an active starter often results in a surplus of "discard." Instead of letting this valuable ingredient go to waste, imagine transforming it into something truly delicious and beneficial! This article will guide you through creating outstanding
Sourdough Flour Tortillas: Tangy & Soft, whether you choose to use active starter or the oft-underestimated discard.
Why Sourdough Flour Tortillas are a Game-Changer for Your Kitchen
Homemade sourdough tortillas aren't just a unique twist on a classic; they represent a significant upgrade in taste, health, and culinary satisfaction. Unlike their store-bought counterparts, these tortillas offer a depth of flavor and a superior texture that is simply unmatched.
*
Unrivaled Flavor and Texture: The magic of sourdough fermentation imparts a subtle, complex tang that complements a vast array of fillings, from savory meats to fresh vegetables. This isn't just about taste; the fermentation also contributes to an incredibly tender and flexible tortilla that holds together beautifully without tearing, making every bite a delight.
*
Boosted Nutritional Profile: Beyond flavor, sourdough offers compelling health advantages. The fermentation process, a cornerstone of sourdough baking, introduces beneficial bacteria that can significantly aid digestion and improve gut health. Scientific studies indicate that this process can also enhance the bioavailability of certain vitamins and minerals present in the flour, making them easier for your body to absorb. This means you're not just enjoying a tasty meal; you're also consuming one that's genuinely good for you.
*
A Healthier, Wholesome Alternative: Crafting your own
Sourdough Tortillas Outshine Store-Bought versions by allowing you complete control over the ingredients. You can opt for high-quality flours, minimize added fats, and avoid the preservatives and artificial additives often found in commercially produced tortillas. This makes them an ideal choice for health-conscious individuals and those with specific dietary preferences.
*
Sustainable and Smart: One of the most compelling reasons to embrace sourdough tortillas is their ability to utilize sourdough discard. This innovative approach turns what might otherwise be waste into a delicious, nutrient-dense component of your meal. It's an excellent way to practice zero-waste cooking and maximize the value of your sourdough starter.
*
Endless Culinary Versatility: The possibilities with homemade sourdough tortillas are virtually limitless. They serve as perfect vessels for classic tacos and burritos, become crispy quesadillas, or even transform into thin-crust pizza bases. Their robust flavor profile also makes them wonderful alongside dips, used as wraps for lunch, or simply enjoyed on their own as a savory snack.
Essential Ingredients for Your Sourdough Tortilla Journey
Creating these delectable sourdough tortillas begins with a handful of simple, high-quality ingredients. The beauty of this recipe lies in its flexibility, allowing you to tailor it to your preferences.
*
All-Purpose Flour: The foundation of your tortillas. While all-purpose flour works perfectly, don't hesitate to experiment with a blend of whole wheat or spelt flour for added nutrition and a nutty flavor profile.
*
Sourdough Starter (Active or Discard): This is where the magic happens. Whether you use a bubbly, active starter or unfed sourdough discard, both will contribute that signature tang and aid in the texture. If using discard, ensure it's been stored at room temperature for at least 30 minutes before mixing for easier incorporation.
*
Water: Lukewarm water is ideal as it helps the dough come together smoothly and facilitates the initial gluten development.
*
Fat (Butter, Lard, or Oil): Fat is crucial for achieving that characteristic tender, pliable texture. Softened butter offers a rich flavor, while lard creates incredibly soft tortillas. A neutral oil, like avocado or vegetable oil, can also be used for a dairy-free option.
*
Salt: Essential for enhancing all the other flavors and balancing the sourdough tang.
*
Optional Enhancements for Flair:
*
Baking Powder: A small amount can be added for a slightly puffier, softer tortilla, especially if you desire a lighter texture similar to some store-bought varieties.
*
Sugar: A pinch of sugar can help with browning and add a subtle sweetness that complements savory fillings beautifully.
*
Herbs and Spices: Elevate your tortillas by kneading in garlic powder, chili powder, cumin, smoked paprika, or dried oregano. Imagine herb-infused tortillas for chicken fajitas or spicy ones for beef tacos!
*
Fine Cornmeal: A tiny amount can add a rustic texture and subtle corn flavor, bridging the gap between flour and corn tortillas.
Remember, the quality of your ingredients directly impacts the final product. Using fresh flour and a vibrant sourdough starter (even if it's discard) will yield the best results.
Mastering the Art of Making Sourdough Flour Tortillas
Making sourdough flour tortillas at home is a remarkably straightforward and incredibly rewarding process. The taste of freshly made tortillas far surpasses anything from a package, and the method is quite forgiving.
Step 1: Gathering and Preparing Your Workspace
Before you begin, ensure all your ingredients are measured and ready. This "mise en place" approach streamlines the process, making it more enjoyable. Have a large mixing bowl, a rolling pin, and a cast-iron skillet or griddle handy. If using butter, make sure it’s softened to room temperature.
Step 2: Mixing the Dough – The Foundation of Flavor
In a spacious mixing bowl, whisk together your flour and salt. If you're adding optional baking powder or sugar, incorporate them here too. Next, add the softened butter (or lard/oil) to the flour mixture. Using your fingertips or a pastry blender, "cut" the fat into the flour until the mixture resembles coarse crumbs. This step is vital for tenderness. Finally, pour in the sourdough starter and water. Stir with a spatula until a shaggy, somewhat sticky dough begins to form. Don't worry if it looks a little messy at this stage; it’s perfectly normal.
Step 3: Kneading for Perfection
Now, it’s time to get hands-on! Continue kneading the dough directly in the bowl for 1-2 minutes until it mostly comes together. Then, turn the dough out onto a lightly floured surface. Knead thoroughly for another 5-7 minutes. The goal is to develop the gluten, transforming the dough from shaggy to smooth, elastic, and pliable. It should feel soft and bounce back slightly when gently pressed. Resist the urge to add too much extra flour during kneading, as this can make your tortillas tough.
Step 4: The Crucial Rest
Once kneaded, gently form the dough into a ball. Cover it with a clean, light kitchen towel or loosely with slightly damp plastic wrap. Allow the dough to rest at room temperature for at least 30 minutes. This resting period is critical; it allows the gluten to relax, making the dough much easier to roll out, and gives the sourdough cultures a bit more time to work their magic, further enhancing flavor and digestibility. For an even deeper flavor, you can refrigerate the dough for up to 24 hours. Just bring it back to room temperature for about an hour before rolling.
Step 5: Dividing and Shaping
After resting, gently punch down the dough and turn it out onto your clean work surface. Divide the dough into equal portions. For standard tacos or burritos, aim for pieces about the size of a golf ball, roughly 1.5 to 2 ounces each. Roll each portion into a smooth, tight ball. Cover these dough balls with the towel again and let them rest for another 10-15 minutes. This second rest is short but important, as it helps prevent the tortillas from snapping back too much during rolling.
Step 6: Rolling Out Your Tortillas
Lightly flour your work surface and rolling pin. Take one dough ball at a time, keeping the others covered. Flatten the ball slightly with your hand, then begin rolling from the center outwards, rotating the dough frequently. Aim for a thin, even circle – about 6-8 inches in diameter for a taco or 10-12 inches for a burrito. Don't worry if they aren't perfectly round; homemade tortillas have character! The thinner you roll them, the crispier they'll be on the edges; thicker ones will be chewier.
Step 7: Cooking Your Tortillas to Golden Perfection
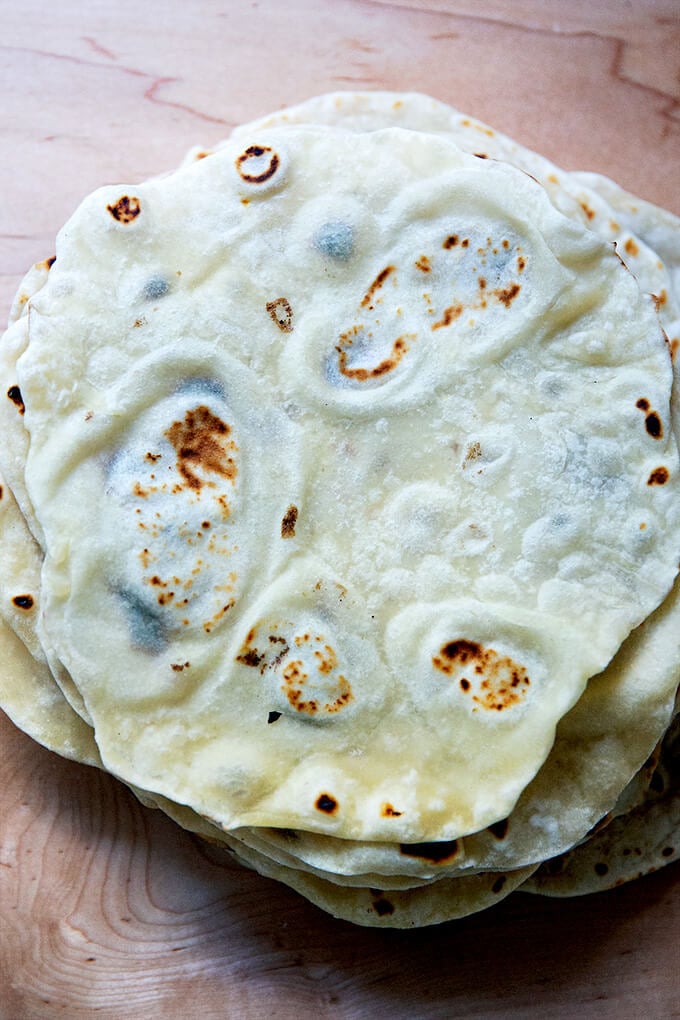
Preheat a cast-iron skillet or griddle over medium-high heat. You want it hot enough to cook quickly but not so hot that it burns. Typically, no oil is needed for cooking. Once hot, place one rolled tortilla onto the dry skillet. Cook for 30-60 seconds per side. You’ll know it’s ready to flip when bubbles begin to form on the surface, and light golden-brown spots appear on the underside. Flip and cook for another 30-60 seconds until the second side also has beautiful brown spots.
As each tortilla finishes cooking, immediately transfer it to a plate and cover it with a clean kitchen towel. This traps the steam, keeping the tortillas soft, pliable, and warm as you cook the rest.
Creative Ways to Enjoy Your Homemade Sourdough Tortillas
Once you’ve experienced the unparalleled taste and texture of freshly made sourdough flour tortillas, you’ll find yourself reaching for them constantly. They are incredibly versatile and can elevate almost any meal.
*
Taco Tuesday Reinvented: Load them with classic carne asada, spicy shrimp, or vibrant veggie fillings like roasted sweet potatoes and black beans.
*
Breakfast Bliss: Use them for hearty breakfast burritos, savory migas, or simply as a side to scrambled eggs and salsa.
*
Beyond the Wrap: Transform them into crispy quesadillas, stacked enchiladas, or even a unique, tangy pizza crust for a quick weeknight dinner.
*
Snack Attack: Cut them into triangles, bake or lightly fry them until crispy, and serve with guacamole, salsa, or your favorite bean dip.
*
Gourmet Wraps: Fill them with deli meats, fresh greens, cheeses, and spreads for a sophisticated lunch wrap that outshines any store-bought version.
Batch cooking is also a great idea. Cooked sourdough tortillas can be stored in an airtight bag in the refrigerator for up to 3-4 days, or frozen for longer storage. Simply reheat them on a dry skillet or in the microwave for a few seconds when ready to enjoy.
Conclusion
Embracing the world of homemade sourdough flour tortillas is a journey into flavor, health, and culinary creativity. With simple ingredients and a straightforward process, you can transform humble flour and sourdough discard into an extraordinary component of your meals. The delightful tang, the soft texture, the digestive benefits, and the satisfaction of zero-waste cooking make these tortillas a truly rewarding project. So, gather your ingredients, fire up your griddle, and prepare to impress your taste buds with these incredible, nutrient-rich sourdough tortillas!